Online Permitting Frequently Asked Questions
Next Steps & Common Questions After Submitting An Application

Thanks for submitting your application! We know this part of the process can sometimes feel a little uncertain, so we’re here to make things easier. In this section, you’ll find simple steps, helpful tips, and clear answers to the questions people ask most often after applying. Review the next steps and common questions before submitting an application. Our goal is to help you feel informed, supported, and confident about what happens next.
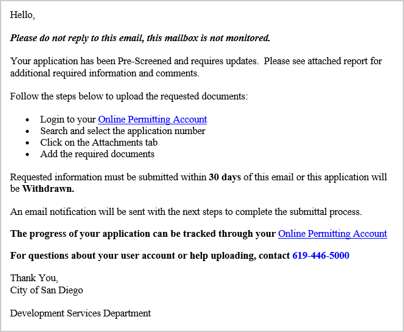
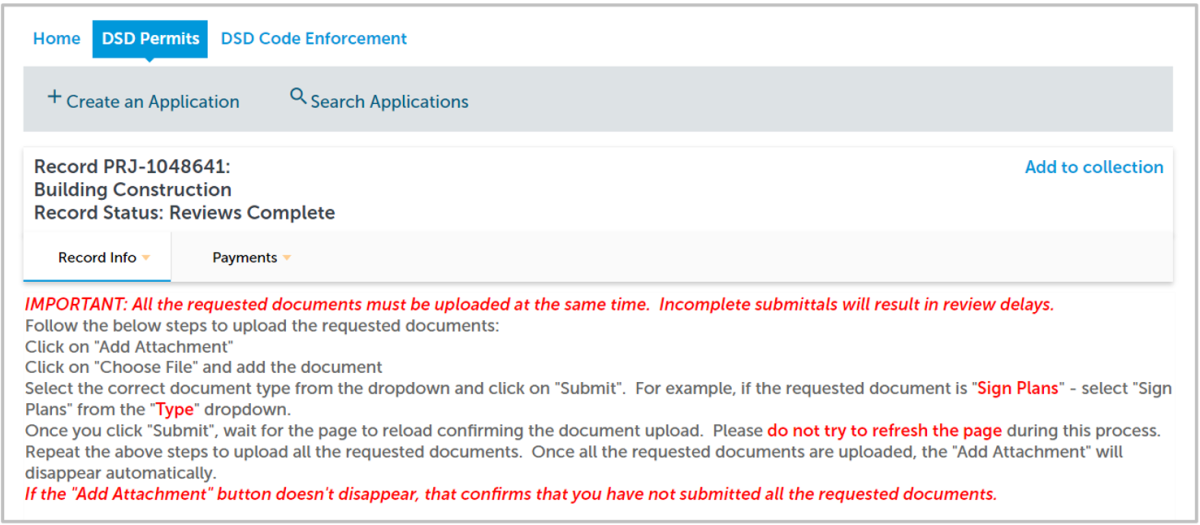
I received an “Updates Required” email. How do I upload the requested documents?
- Log in to your Online Permitting Account.
- Enter your username and password.
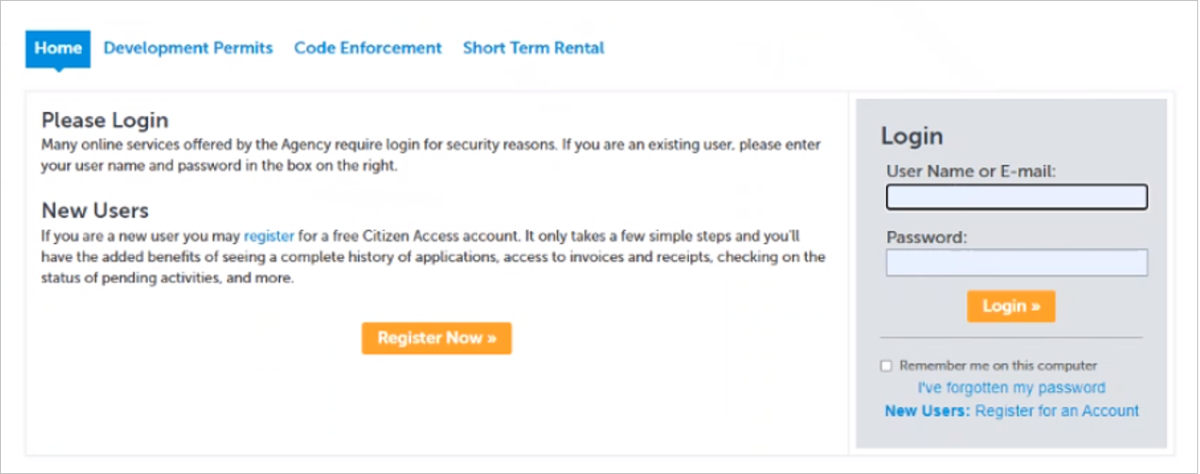
- Open the “Updates Required” email, and click either of the email links to go to your account and make project updates.
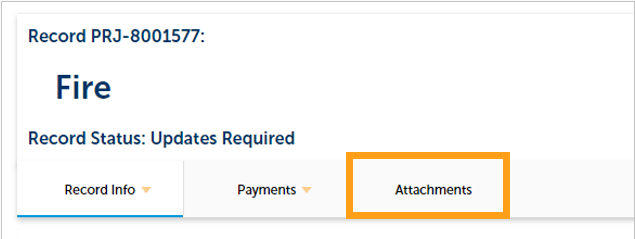
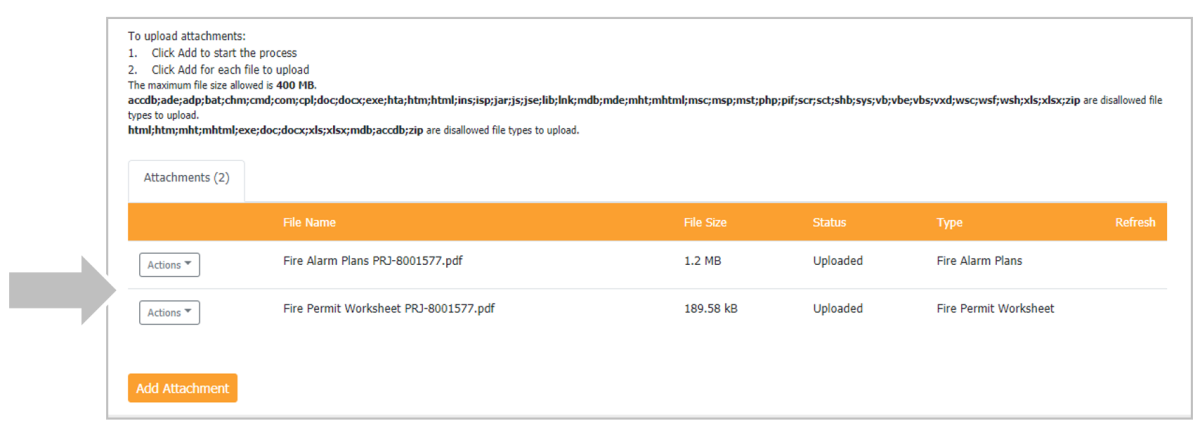
- Your project information will load. Then, click the “Attachments” tab.
- Previously attached documents will be displayed.
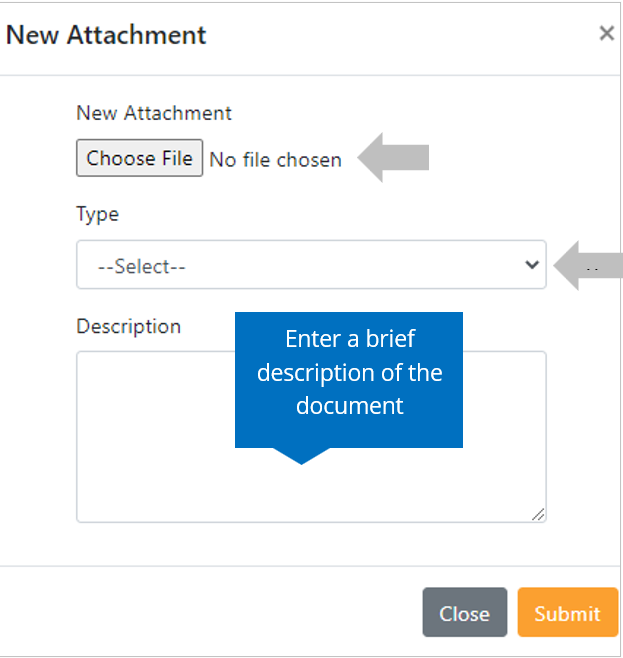
- Click “Add Attachment.”
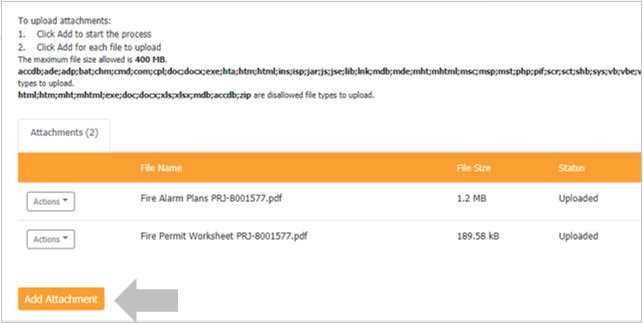
- Adding a new Attachment:
- Select “Choose File” and drag/drop or search your files to attach them.
- Click the Type drop-down and select the file type.
- Provide a brief description of the document.
Click the “Submit” button.
The documents will be uploaded to the project record (PRJ), once the online system verifies they meet all requirements for digital plans & documents.

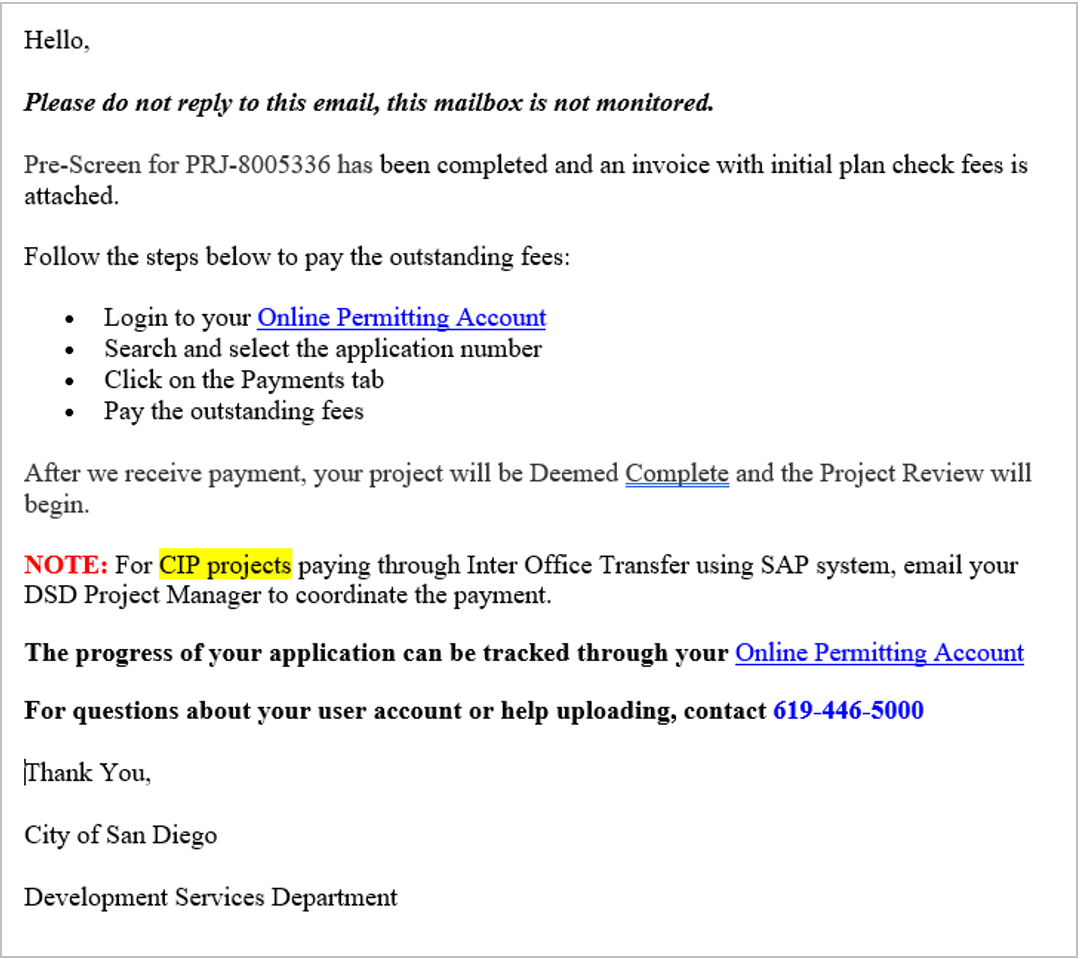
I received a "Review Pending Invoice Payment" email. How do I pay?
- Log in to your Online Permitting Account.
- Enter your username and password.
- Open the “Review Pending Invoice Payment” email. Then, click a link to log in to your account and make the payment.
- Now you have two options:
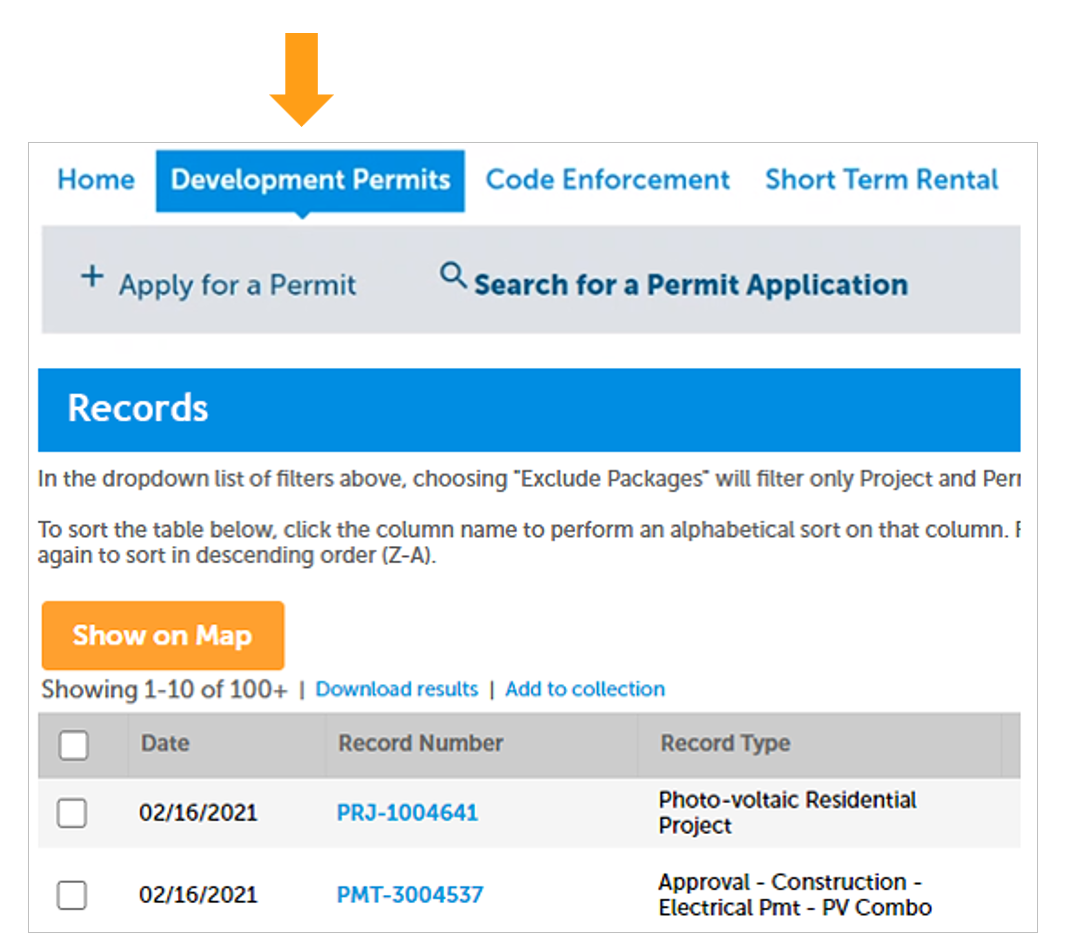
- Click on the "Development Permits" tab, and then select the record listed in the email.
OR
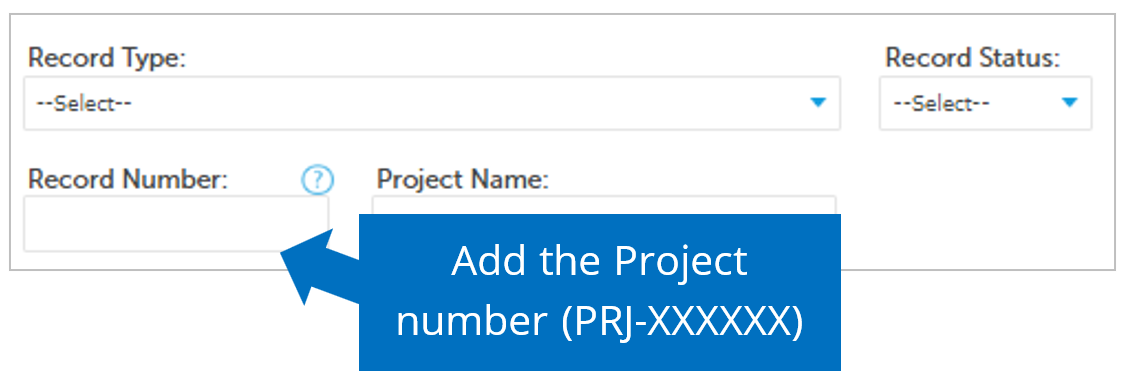
- Scroll down to the search field for Records. Then input the PRJ into the General Search in this format: PRJ-1234567.
- Verify that the record has the status: Application Pending Payment.
- Click on “Payments.”
- Select “Fees.”
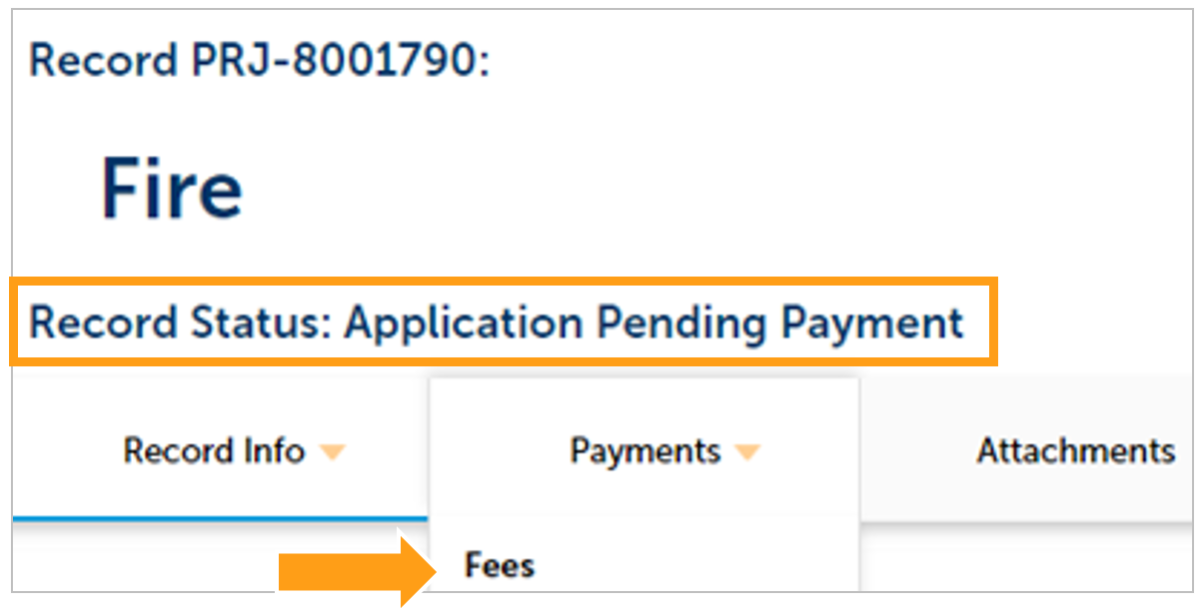
- Click on “Pay Fees.”

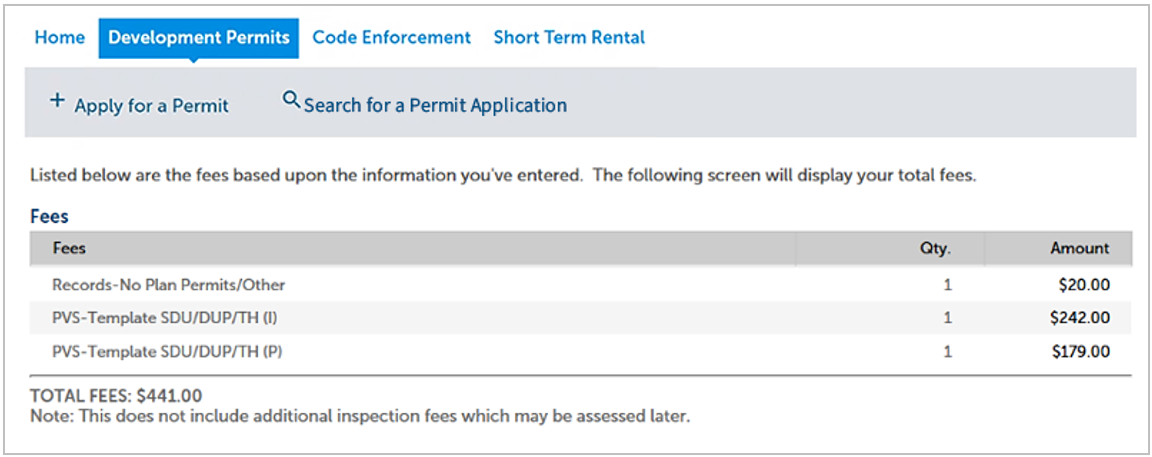
- The following screen will load. Follow the instructions to pay.
I received a "Recheck Required" email from a review discipline. How do I look for the Issues Report?
- Log in to your online permitting account.
- Enter your username and password. If you are a new user, see the tutorial on registering for an account.
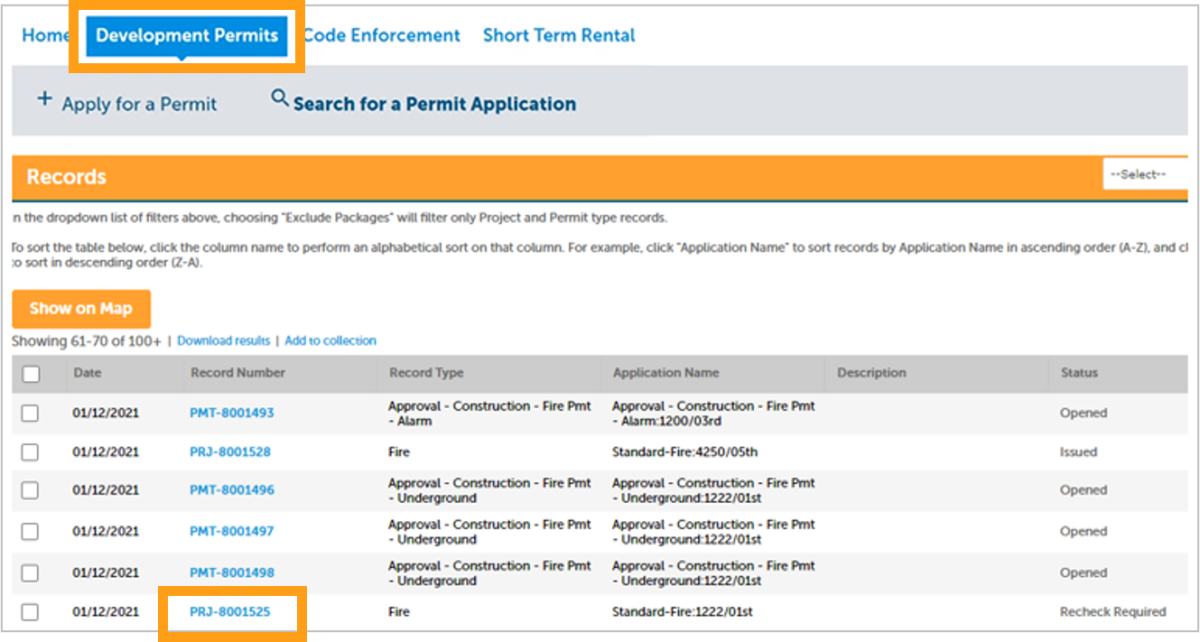
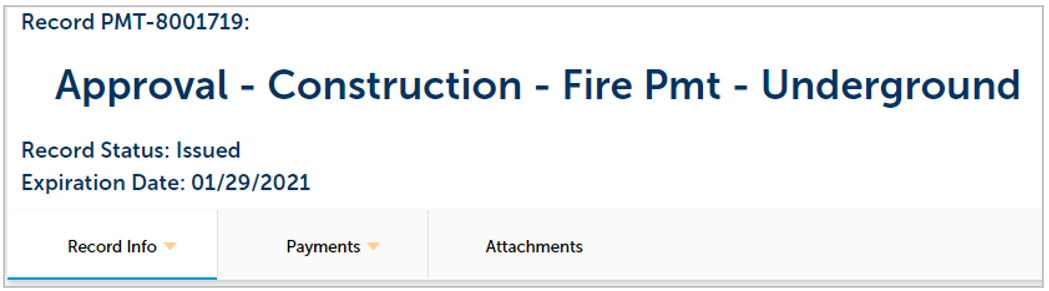
- Once on the website, select "Development Permits." Then, your records will display with the current statuses. Last, click on the blue PRJ link of the project you wish to see the Project Issues Report for.
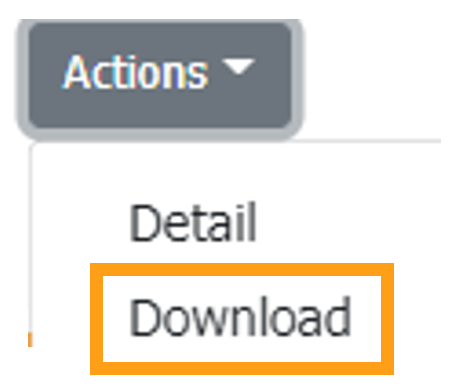
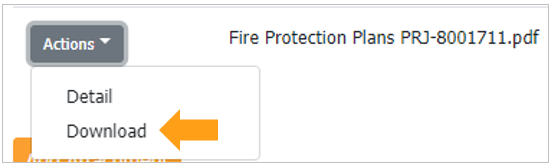
- Previously attached documents will be displayed. You will see your Project Issues Report, displayed by discipline. Then, click the “Actions” drop-down.
- Click “Download," and the selected Project Issues Report will download.
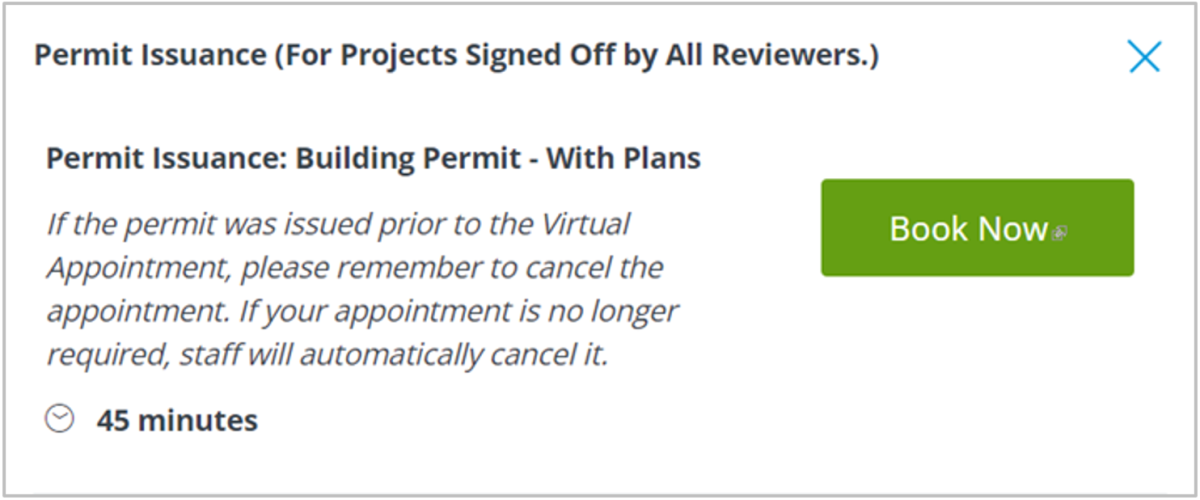
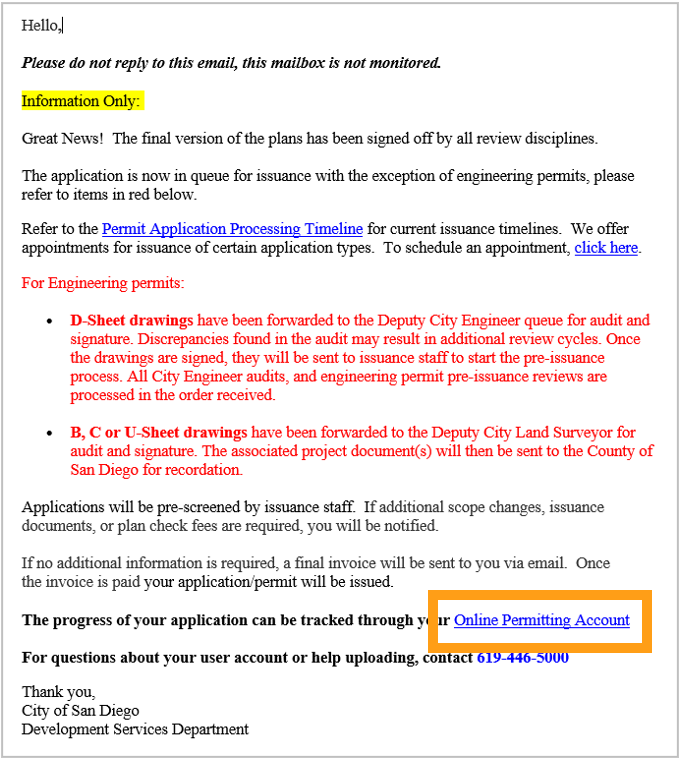
I received a "Final Version Signed Off" email. What do I do next?
The application is now in the queue for issuance. Refer to the Permit Application Processing Timeline for current issuance timelines.
We offer Permit Issuance (for projects signed off by all reviewers) appointments for qualified application types. During this virtual appointment, a staff member will remove your project from the active queue to expedite its issuance and will complete the issuance process with you in real time. Schedule an Issuance appointment.
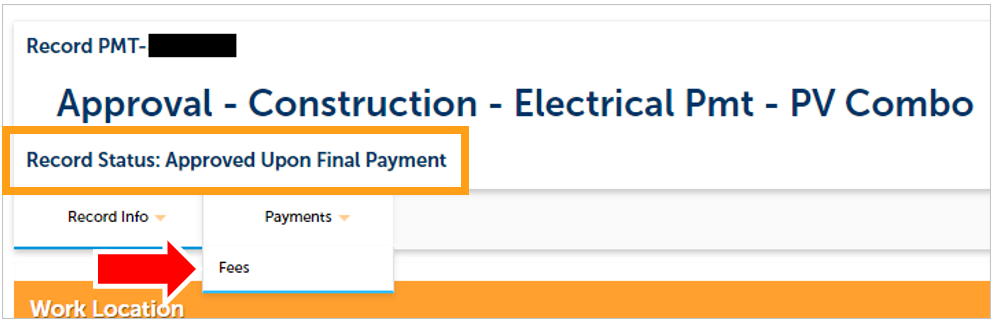
I received a "review Complete/Permit Ready for Payment" email. How do I pay my invoice?
- Log in to your Online Permitting Account.
- Enter your username and password.
- Open the “Approved” email. Then, click a link to log in to your account and make the payment.
- Now you have two options:
- Click on the "Development Permits" tab, and then select the record listed in the email.
OR
- Scroll down to the search field for Records. Then input the PRJ into the General Search in this format: PRJ-1234567.
- Verify that the record has the status: Approved Upon Final Payment”.
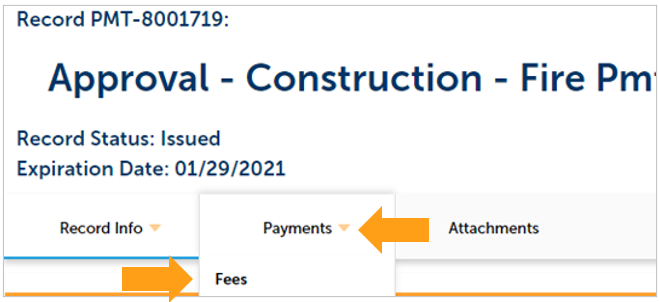
- Click on “Payments.”
- Select “Fees.”
- Click on “Pay Fees.”
- The following screen will load. Follow the instructions to pay.
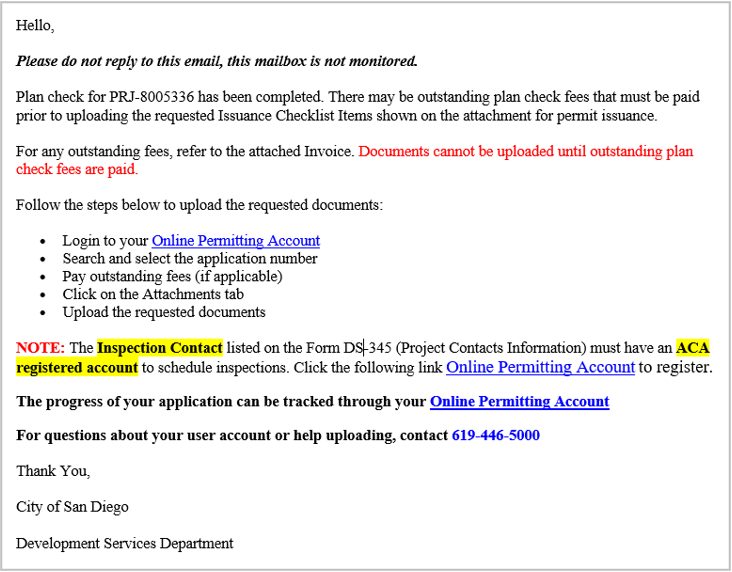
I received an "Issuance Checklist Requested" email. How do I submit the requested documents?
Missing Information? You will receive an Updates Required email if additional information is needed to issue the permit.
- Log in to your Online Permitting Account.
- Enter your username and password.
- Open the “Issuance Checklist” email, and click either of the email links to go to your account and make project updates.
- Click on a link to log in to your account and submit documents.
- Once on the website, select "Development Permits." Then, your records will display with the current statuses. Last, click on the blue PRJ link of the project you wish to see the Project Issues Report for.
- Your project information will load. Then, click the “Attachments” tab.
- Previously attached documents will be displayed. You will see your Project Issues Report, displayed by discipline. Then, click the “Actions” drop-down.
- Adding a new Attachment:
- Select “Choose File” and drag/drop or search your files to attach them.
- Click the Type drop-down and select the file type.
- Provide a brief description of the document.
- Click the “Submit” button.
- Repeat until all requested documents have been uploaded.
- The documents will be uploaded to the project record (PRJ), once the online system verifies they meet all requirements for digital plans & documents.
The Permit Status is "Issued." How do I Download my Approved (Stamped) Plans?
- Log in to your online permitting account.
- Enter your username and password.
- Once on the website, select "Development Permits." Then, your records will display with the current statuses. Last, click on the blue PRJ link of the project containing the record you wish to print by clicking on the blue link.
- Your records will be displayed. Then, click the “Actions” drop-down to download the plans.
- Click “Download," and the selected Project Issues Report will download.
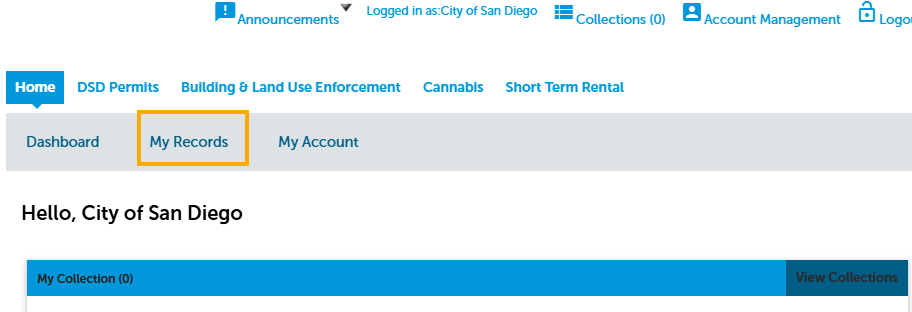
How do I Schedule Inspections?
- Log in to your online permitting account.
- Enter your username and password.
- Once on the website, click on “My Records” and your records will be displayed.
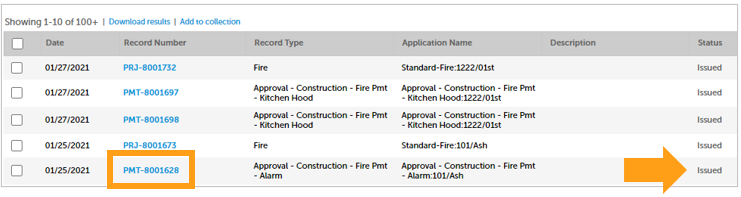
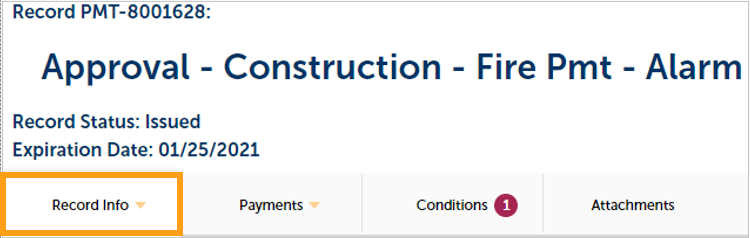
- Click on the permit number for which you would like to schedule an inspection. The status must be Issued to schedule an inspection.
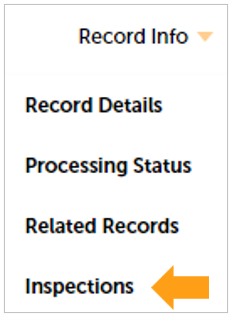
- Click on the “Record Info” tab for drop-down options.
- Click on “Inspections”
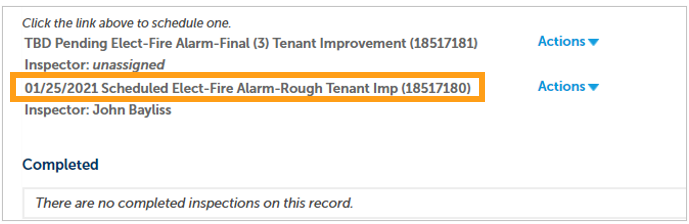
- The inspections screen will appear, showing Upcoming and Completed inspections. Click on the “Actions” link of the inspection you would like to schedule.
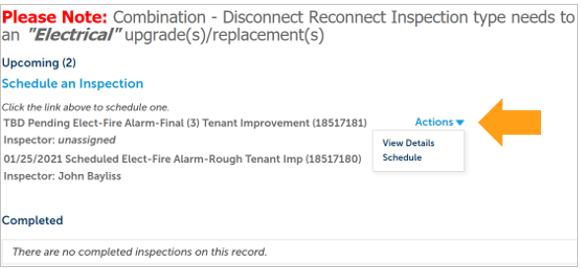
- Click on the ‘Schedule’ link.

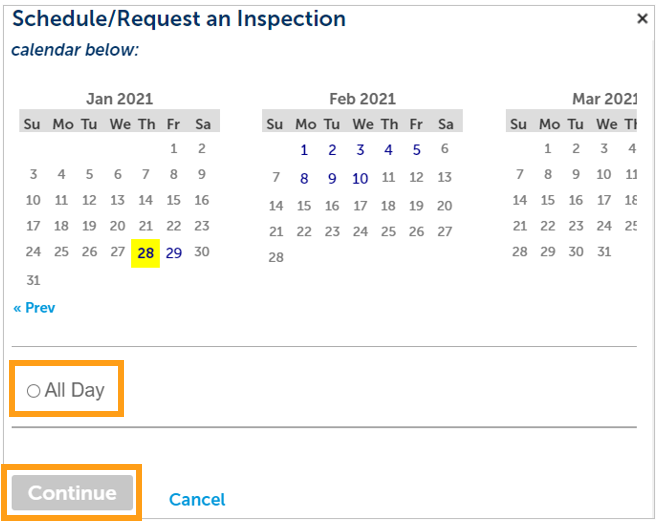
- Click on the date you would like the inspection. It must be a future date; not on the same day. Then, click on the “All Day” radio button and finally click “Continue.”
- The following screen will be displayed. If needed, click on “Change contact” to enter a new person for the inspector to contact. If there are no changes, click on “Continue.”

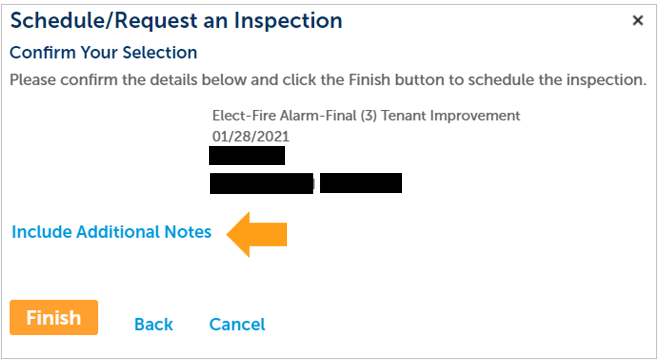
- The following screen will be displayed. Review the information and if correct then click “Finish.” If not correct, click “Back” to edit the information, or click “Cancel” to start over. Include any additional notes for the inspector here.
- Click “Continue.” You will be returned to the Inspections screen, where you can confirm that the inspection was properly scheduled.
How to Submit a Construction Change Application
- Log in to your online permitting account.
- Enter your username and password.
- Press the Login button.
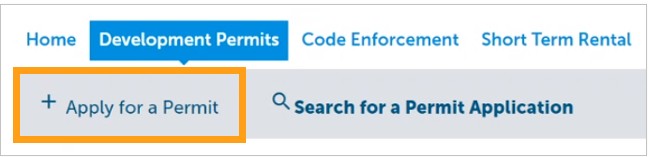
- Once on the website, select "Development Permits." Then, click on “Apply for a Permit.”
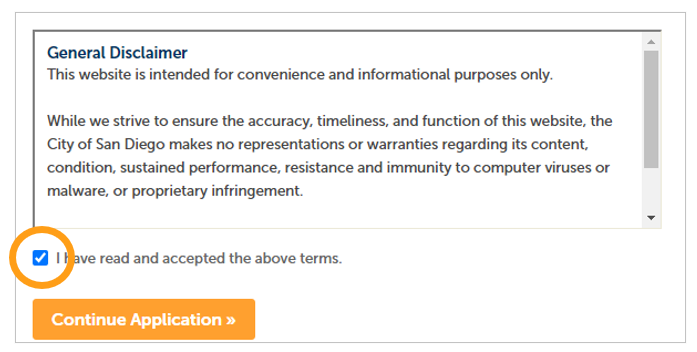
- Read the General Disclaimer and then place a check mark confirming your acceptance. Then, click “Continue Application”
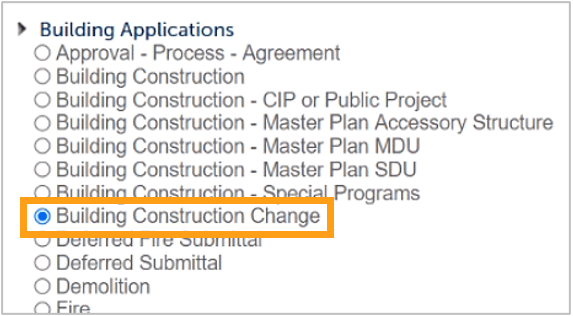
- Select “Building Construction Change.”
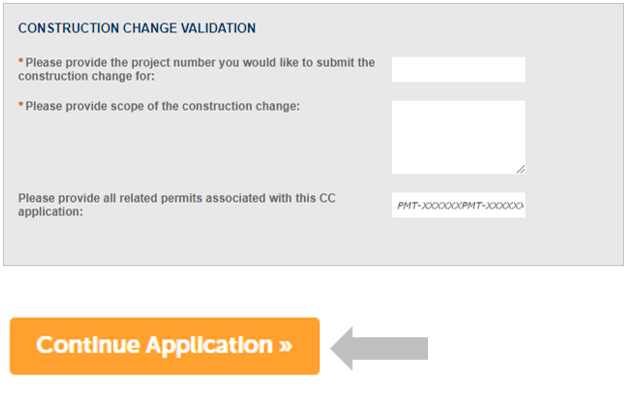
- Enter the PRJ # in the exact format PRJ-XXXXXXX Then, provide a narrative of the changes proposed, and enter the permits affected by this construction change application.
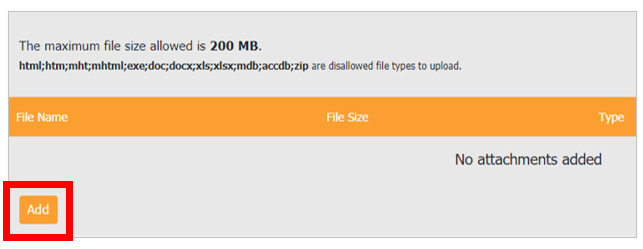
- Click “Add” to upload the documents that reflect the proposed changed.
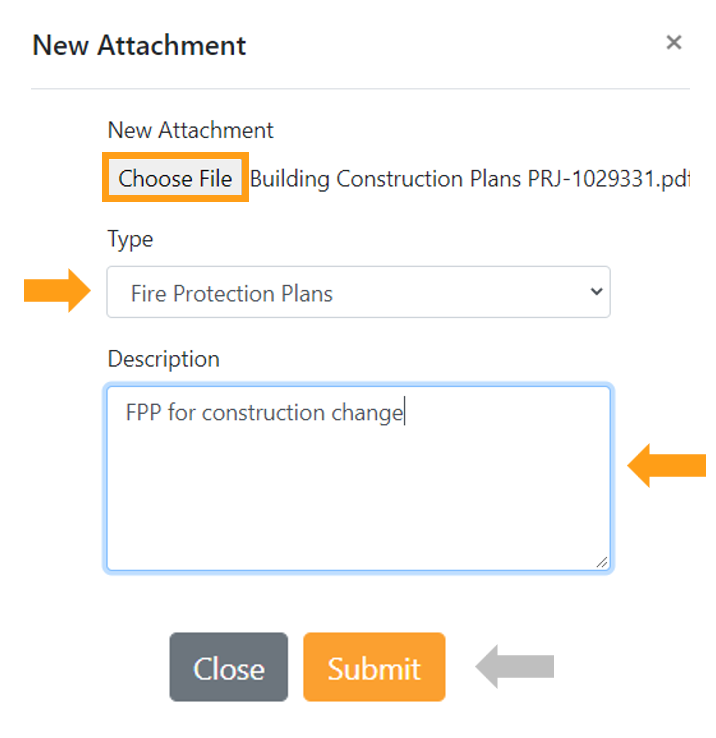
- Click “Choose File” and select from your computer.
- Provide the Type of document that you are uploading.
- Provide a brief description of the document.
- Click “Submit.”
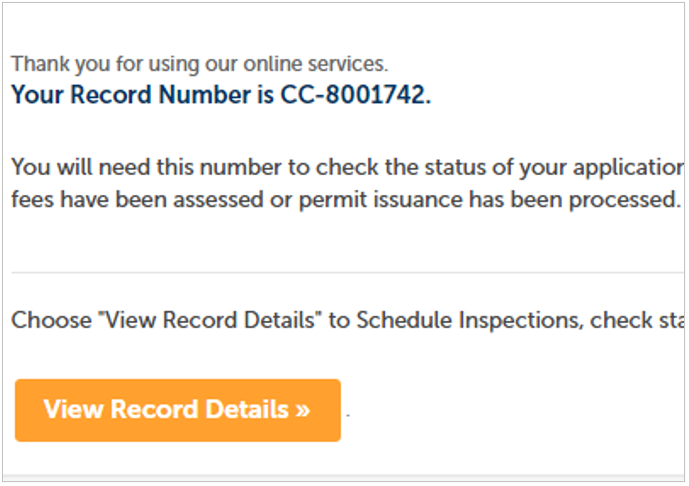
- You will get a message displaying the CC number you created, and you will also receive a confirmation email with the number.
I Received a "Pending Invoice Payment" Email for my Construction Change. How Do I pay?
- Log in to your Online Permitting Account.
- Enter your username and password.
- Open the “Review Pending Invoice Payment” email. Then, click a link to log in to your account and make the payment.
- Now you have two options:
- Click on the "Development Permits" tab, and then select the record listed in the email. In this case search for your CC number.
OR
- Scroll down to the search field for Records. Then input the CC number into the General Search in this format: CC-123456.
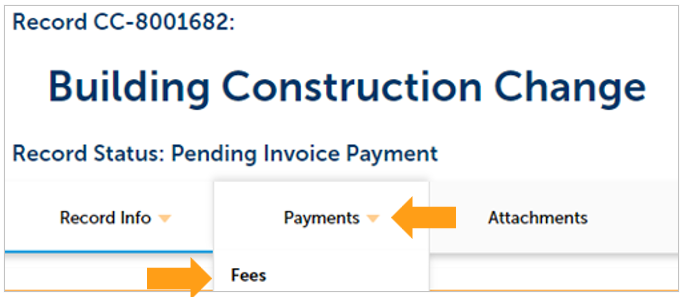
- Verify that the record has the "Pending Invoice Payment" record status.
- Click on “Payments.”
- Select “Fees.”
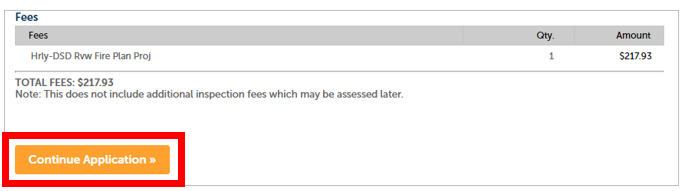
- Click on “Pay Fees.”
- The following screen will load. Follow the instructions to pay.
How do I download the approved plans?
- Log in to your Online Permitting Account.
- Enter your username and password.
- Click on the "Development Permits" tab, and then select the record by clicking on the blue link.

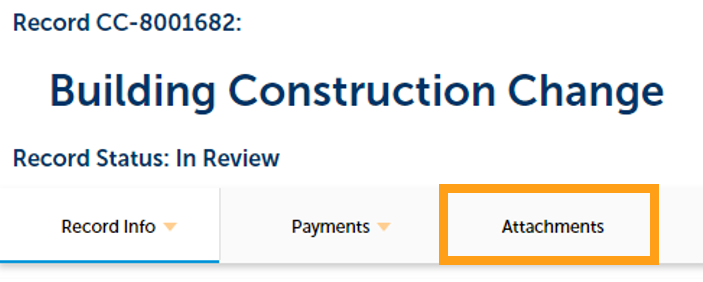
- The record details will be displayed. Then, click on the “Attachments” tab.
- The attachments for this project will be displayed.

- Click on the “Actions” drop-down and click “Download.”
How do I Print an Approval Report?
- Log in to your online permitting account.
- Enter your username and password.
- Once on the website, click on “My Records” and your records will be displayed.
- Click on the permit number for which you would like to print the approval report.

- The selected record will be displayed.
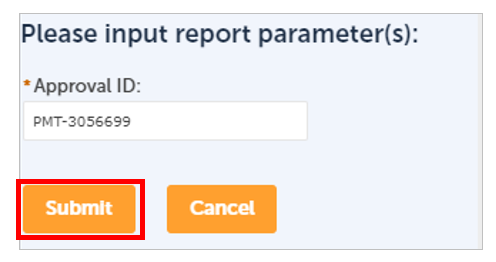
- Click on the “Reports” drop-down menu, and then select “Approval.”

- A pop-up window will open. Make sure that the correct permit number appears, if not, enter the correct permit number. Then, click “Submit.”
How do I Print an Invoice Report?
- Log in to your online permitting account.
- Enter your username and password.
- Once on the website, click on “My Records” and your records will be displayed.
- Click on the permit number for which you would like to print the invoice report.
- The selected record will be displayed.
- To generate the Invoice report, click the“Payments” tab, then “Fees.”
- Make note of the invoice number.
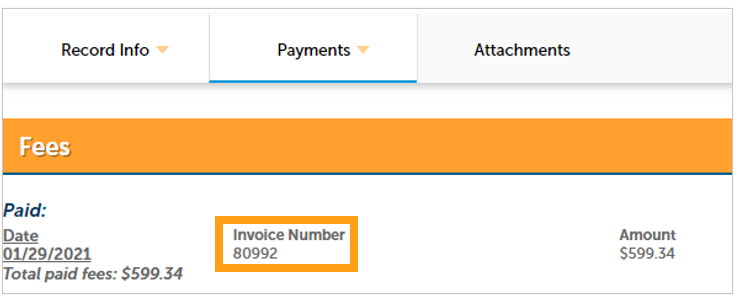
- Click on the “Reports” drop-down, and then select “Invoice” from the menu.

- A pop-up window will open. Make sure the correct invoice number appears; if not, enter it. Then, click “Submit.” The Invoice of the Permit or Project will be displayed in PDF format.
Workflow/Record Status Mapping and Definitions
View the Workflow/Record Status Mapping and Definitions
The table provides a step‑by‑step overview of how your project moves through the City’s permitting process. As your application progresses, it passes through a series of workflow tasks and corresponding record statuses. This table helps you understand what each status means, what stage your project is in, and what actions—if any—are needed from you.
Each row shows:
- Task Name
The stage of the review or issuance process. - Workflow Task Status
The internal status assigned by staff or the online permitting system as your project moves forward. - Record Status (Project)
The status you will see associated with your project record. - Process Description
A brief explanation of what that status means for your application, including when staff are reviewing your materials, when updates are needed, and when your project is ready for issuance or closure.
You can use this table as a quick reference to better understand your project’s current position in the workflow and what to expect next.
What are the Requirements for Digital Plans & Documents?
View the Requirements for Digital Plans & Documents