

Apply for a Standalone Mechanical / Electrical / Plumbing Permit
Development Services Department (DSD) Online Permits

In this How-to Guide:
- How to Submit an Application
- Selecting the Correct Record Type
- Selecting the Project Location
- Selecting the Address
- Selecting the Parcel
- Answer Code Enforcement Violation Question
- Adding an Inspection Contact
- Scope & Timeline
- Permit-specific Requirements
- Upload the Required Documents
- Upload Additional Documents
- Workers' Compensation Declaration
- Application Review
- Confirmation of Submittal & Creation of PRJ#
How DSD’s Online Permitting Process Works
DSD uses a fully cloud‑based permitting system that allows you to submit applications and upload plans or documents anytime, 24/7.
- Submit Your Application
When you submit a new permit application, DSD reviews your documents to confirm they are complete and calculates the fees you owe. - Pay Required Fees
After you pay the plan‑check and other required fees, your project is placed into the correct review queue and assigned to the appropriate reviewers. - Plan Review & Cycle Issue Reports
Each review discipline evaluates its portion of the plans and issues a cycle issues report. You won’t be able to upload corrections or responses until all review disciplines have finished their cycle, even if one reviewer finishes early. - Respond to All Review Comments
Once all cycle issues are released, you can upload your corrected plans and responses. If multiple disciplines request corrections, you must combine all responses into one file in the required file format. All corrections must be submitted together—you cannot upload responses for individual disciplines separately.
Steps | Screen Reference |
|---|---|
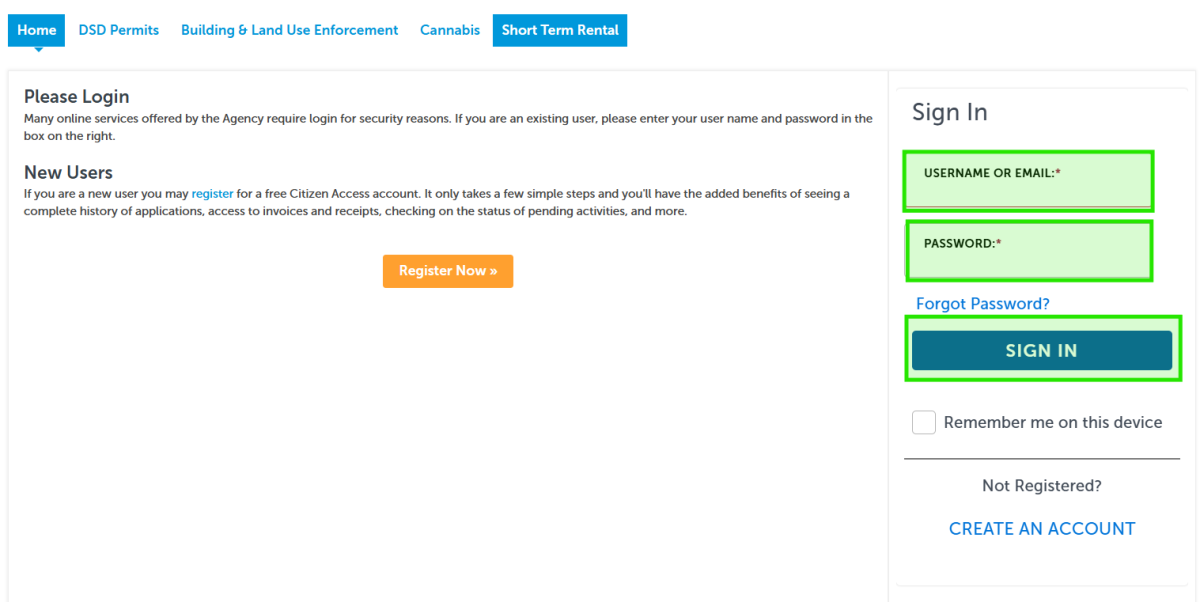
1 | How to Submit an Application
|
2 | Click on “DSD Permits.” 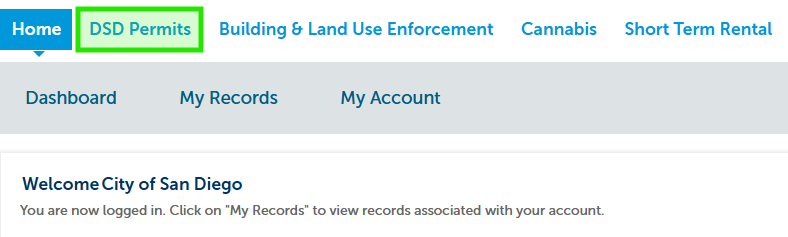
|
3 | Click on "Create an Application." 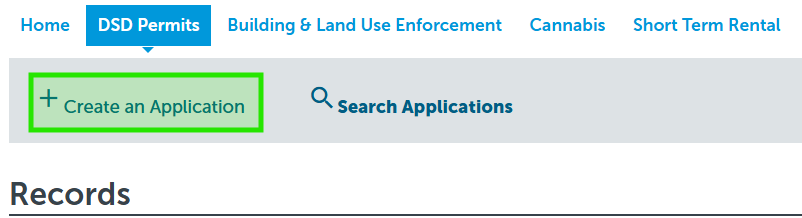
|
4 |
|
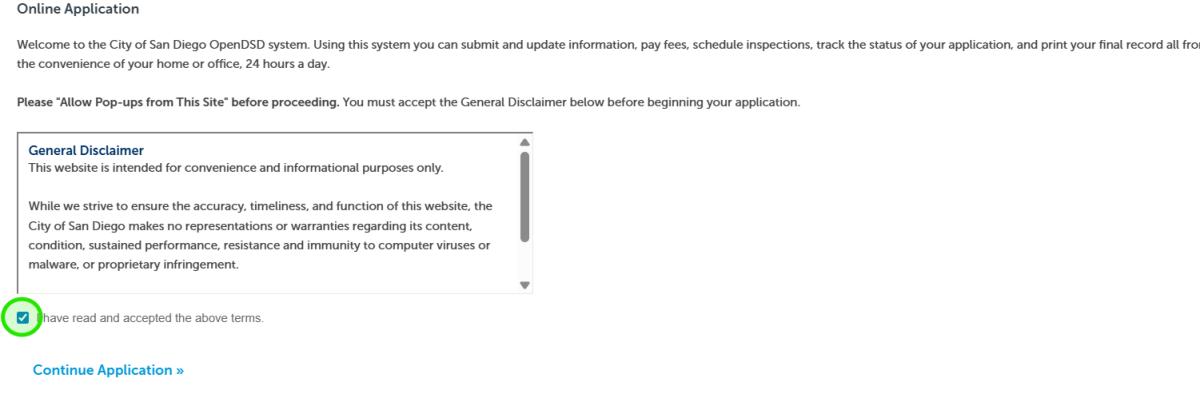
5 | Click on “Continue Application.” 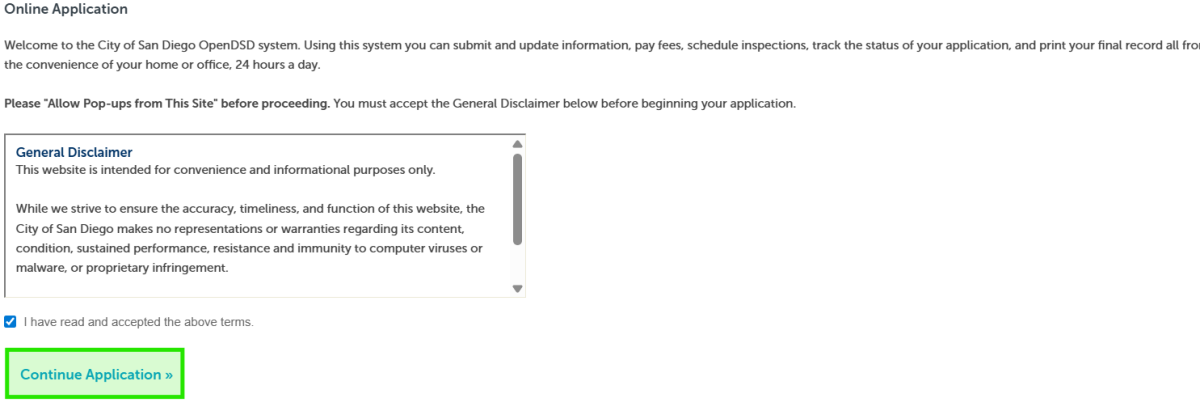
|
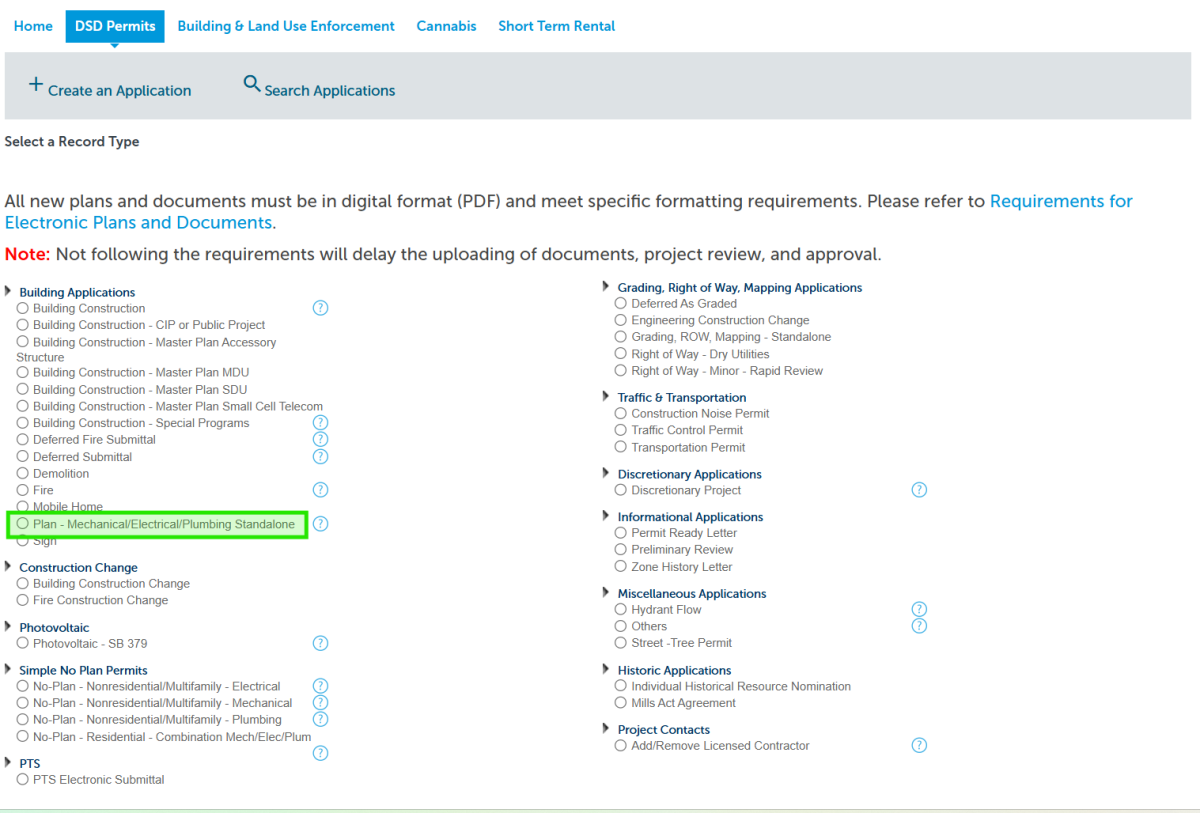
6 | Selecting the Correct Record TypeSelect "Plan - Mechanical/Electrical/Plumbing Standalone," which are for:
|
7 | Press on "Continue Application." 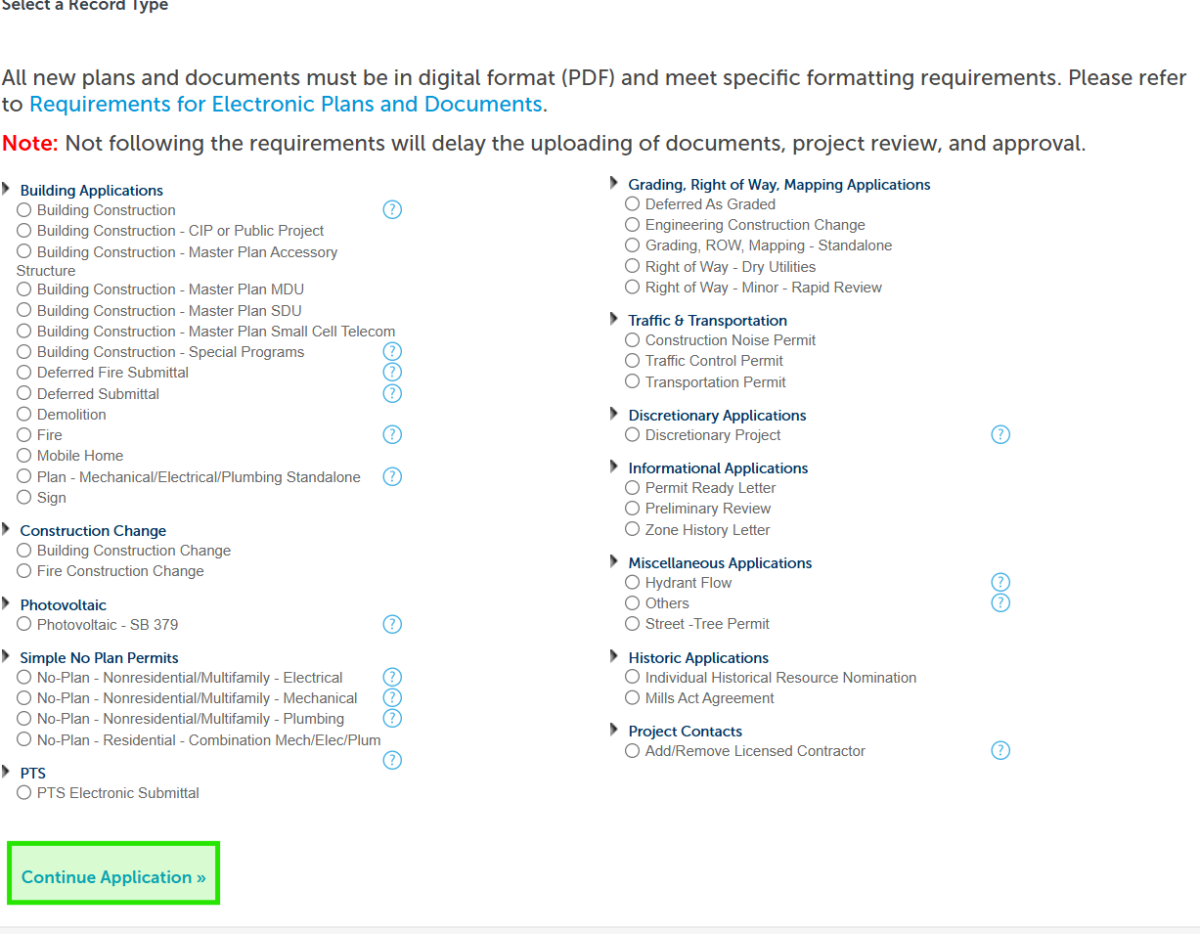
|
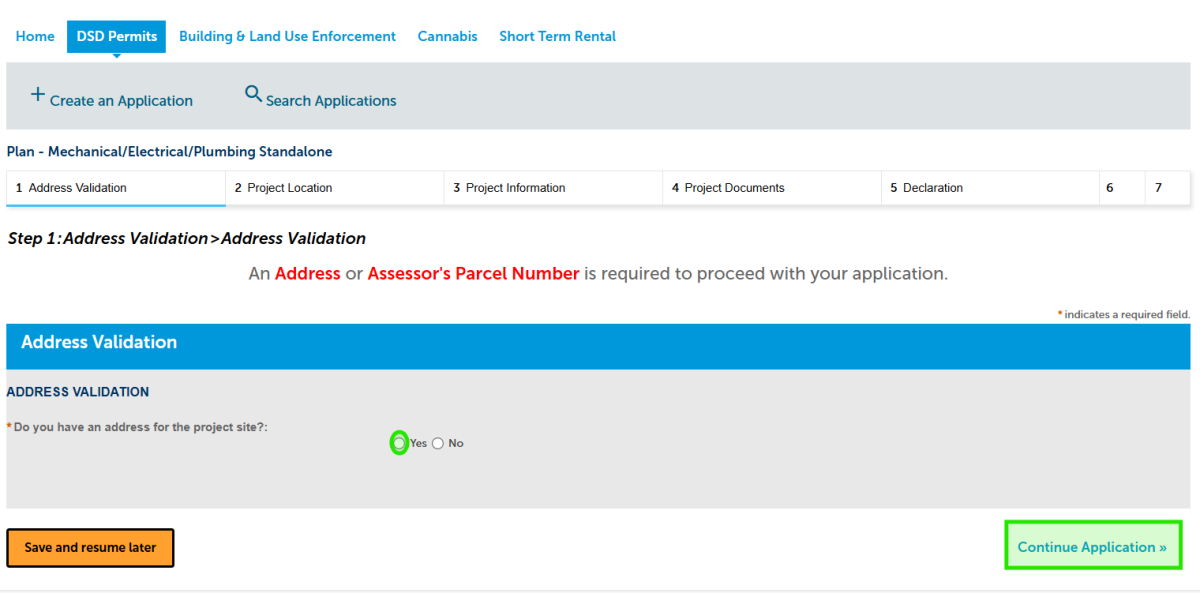
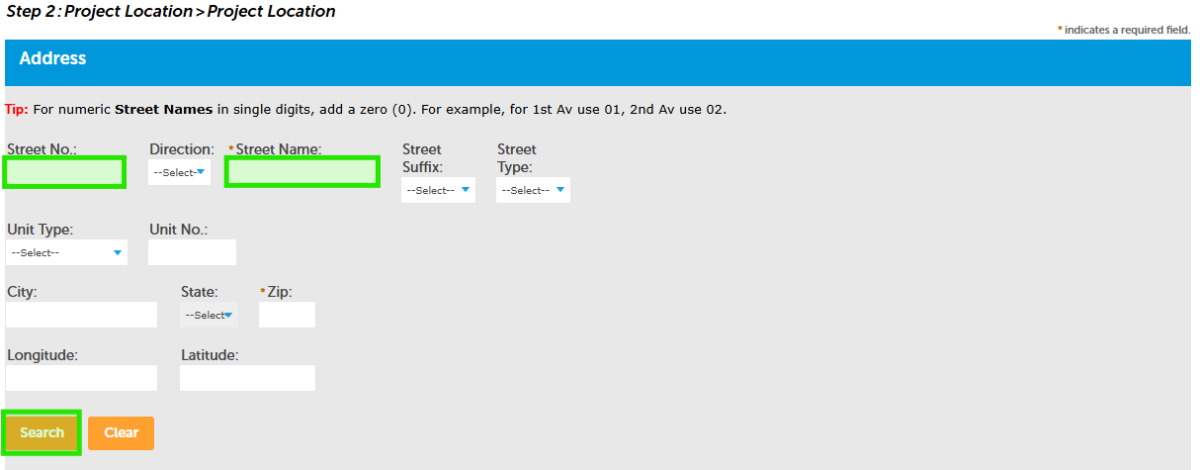
8 | Selecting the Address
|
9 | Option 1: Selecting the Project Location by Address
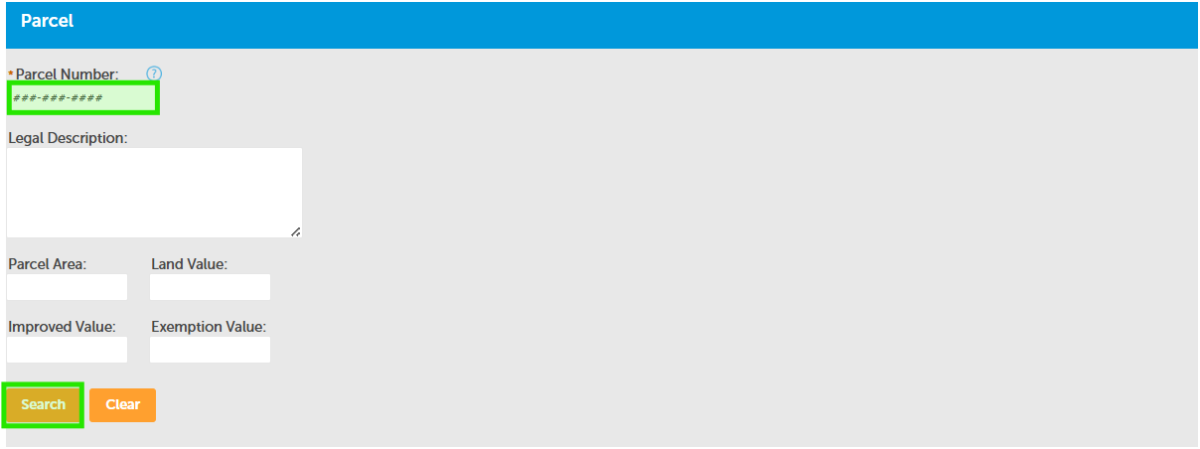
Option 2: Selecting the Project Location by Parcel
|
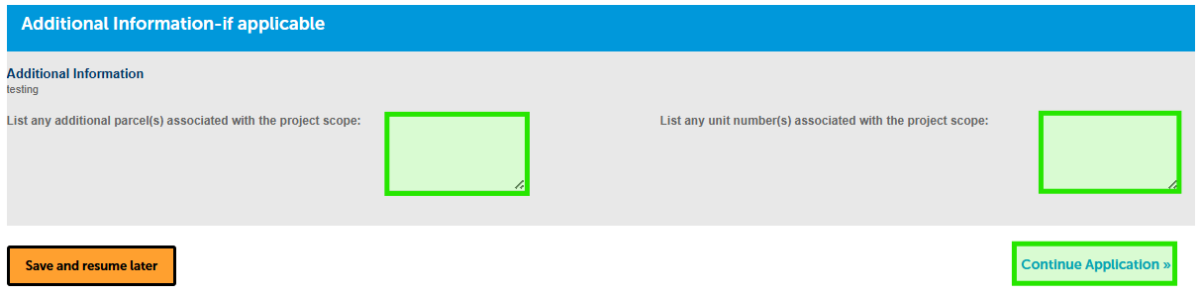
10 | Additional Information
|
11 | Adding Project Contacts (Permit Holder)Select from your account or add a new Permit Holder:
Option 1: "Select from Account" 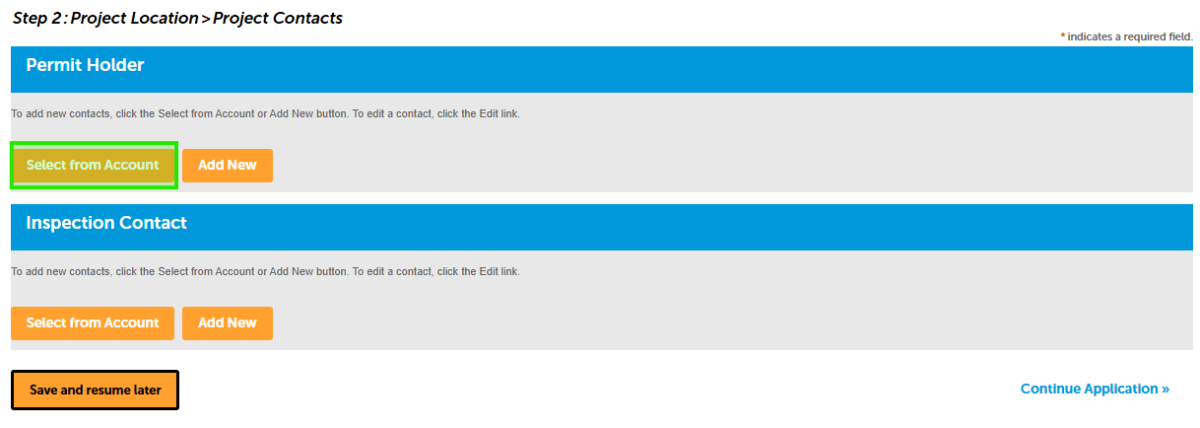
If your account has a registered user, it will be automatically selected, and a green checkmark will indicate that the Permit Holder was successfully added. 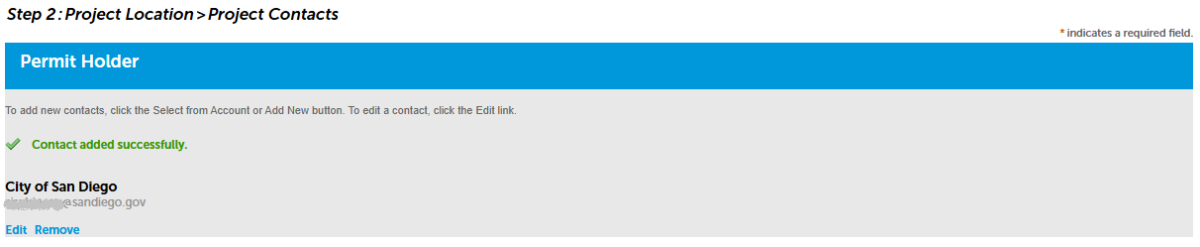
Option 2: "Add a new Permit Holder." 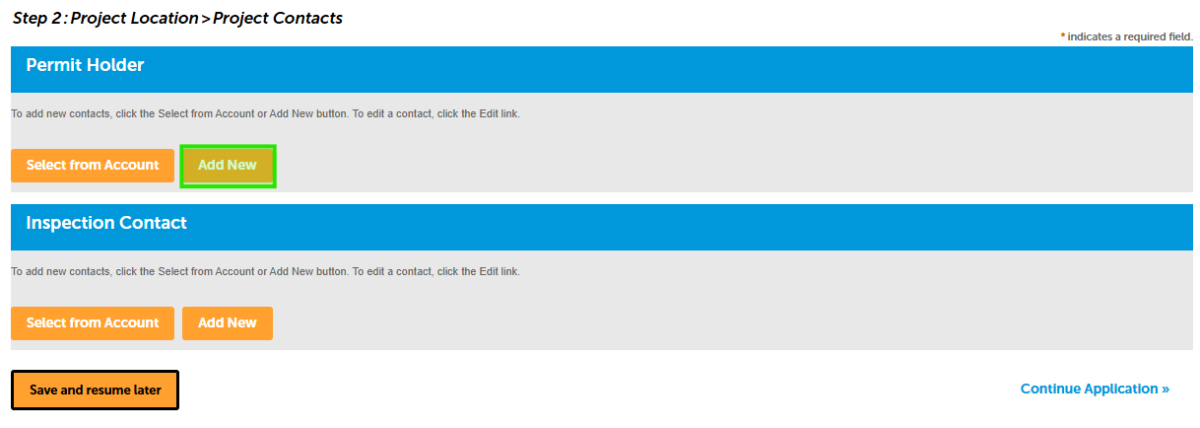
When adding a new Permit Holder, you must first select if the Permit Holder is an "Organization" or an "Individual." 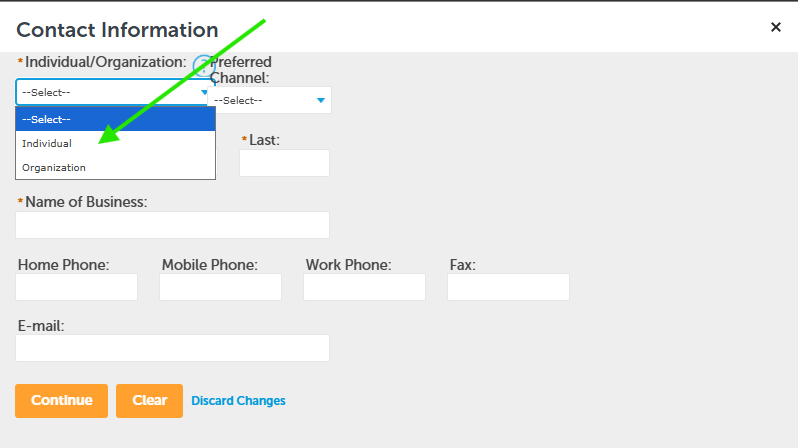
Then fill out the required fields and all other contact information. Please note that an email address registered in the online permitting portal is not required for the Permit Holder. Once all information has been inserted, select "Continue." 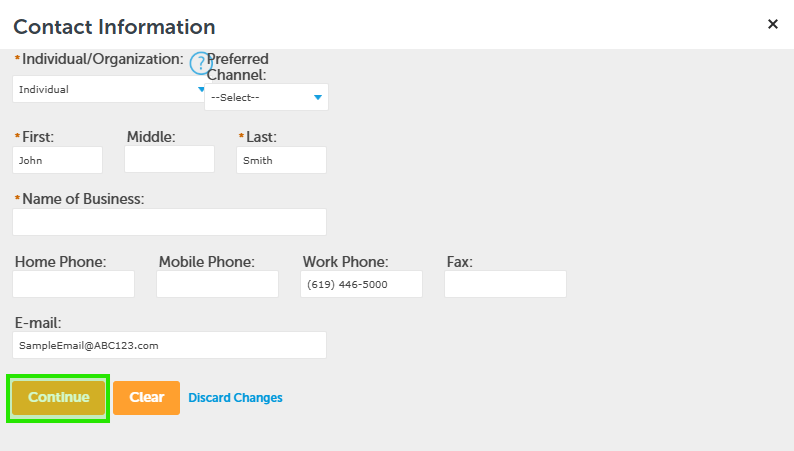
|
12 | Adding an Inspection ContactSelect or add a new Inspection Contact:
Option 1: "Select from Account" 
If your account has a registered user, it will be automatically selected, and a green checkmark will indicate that the Inspection Contact was successfully added. 
Option 2: "Add a new Inspection Contact." 
When adding a new Inspection Contact, you must first select if the Inspection Contact is an "Organization" or an "Individual."
Then fill out the required fields and all other contact information. Please note that an email address registered in the online permitting portal is not required for the Inspection Contact. Once all information has been inserted, select "Continue."
A green checkmark indicates that the Inspection Contact was successfully added. 
|
13 | Answer Code Enforcement Violation Question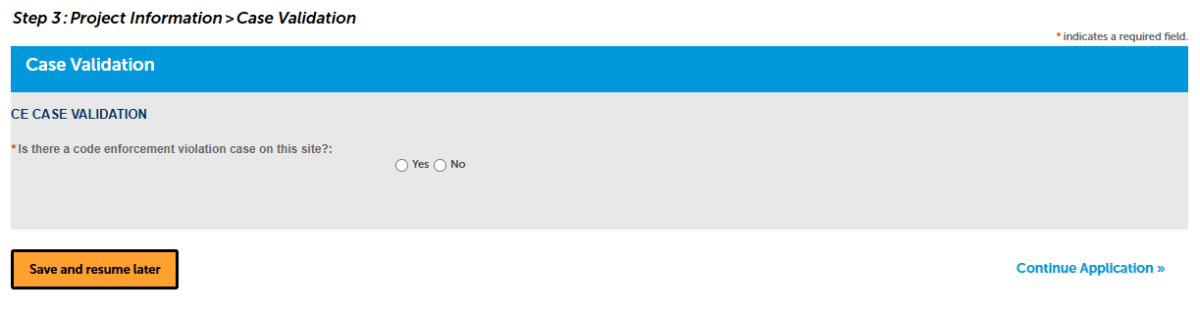
If the answer is no, select "No," and then click on "Continue Application." 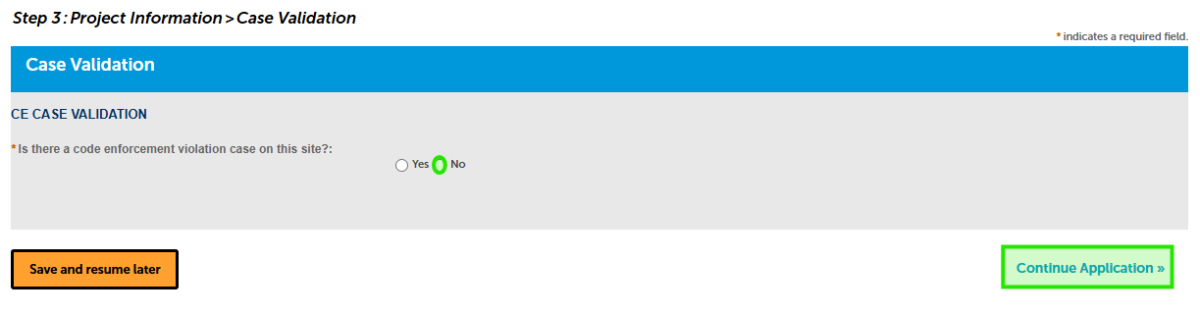
If “yes,” answer the additional questions, and then select "Continue Application." 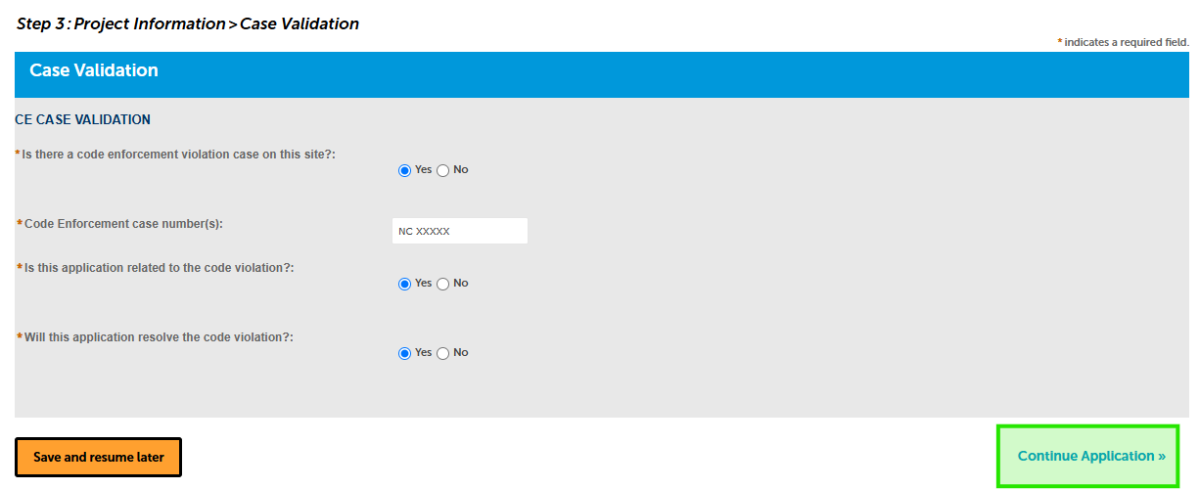
|
14 | Scope & TimelineProvide the:
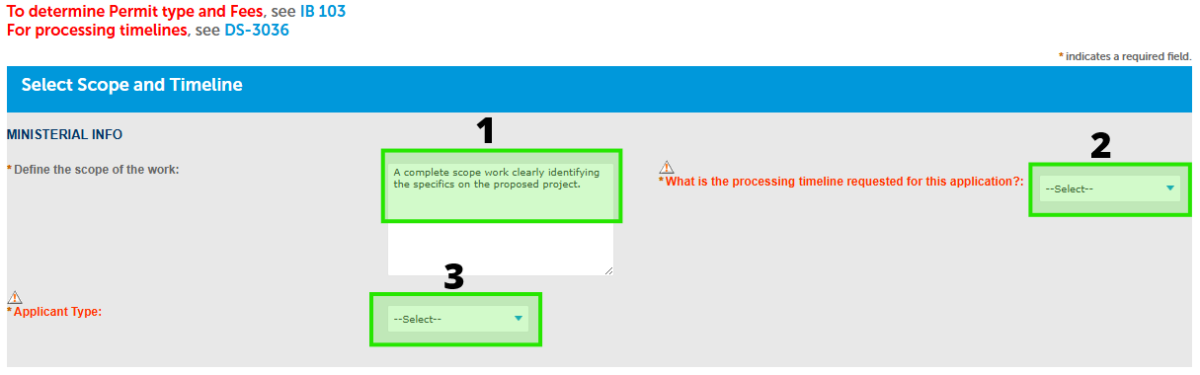
|
15 | Permit-Specific Requirements
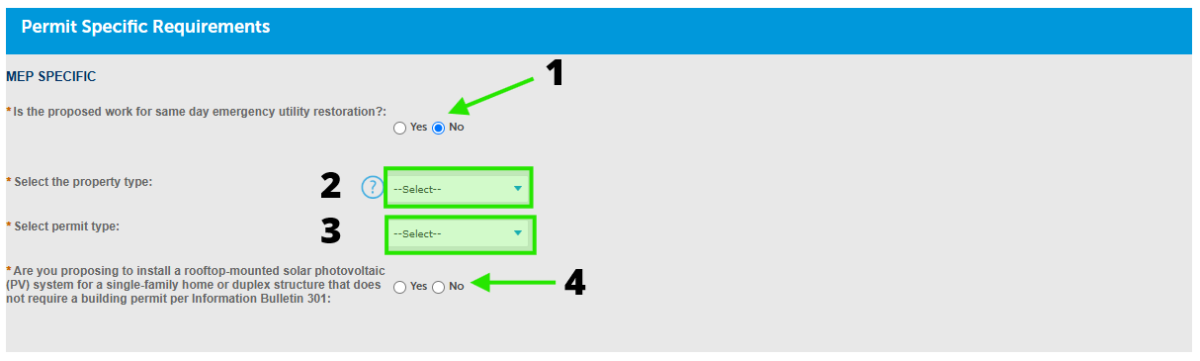
|
16 | Upload the Required DocumentsUpload all required project documents, as listed.
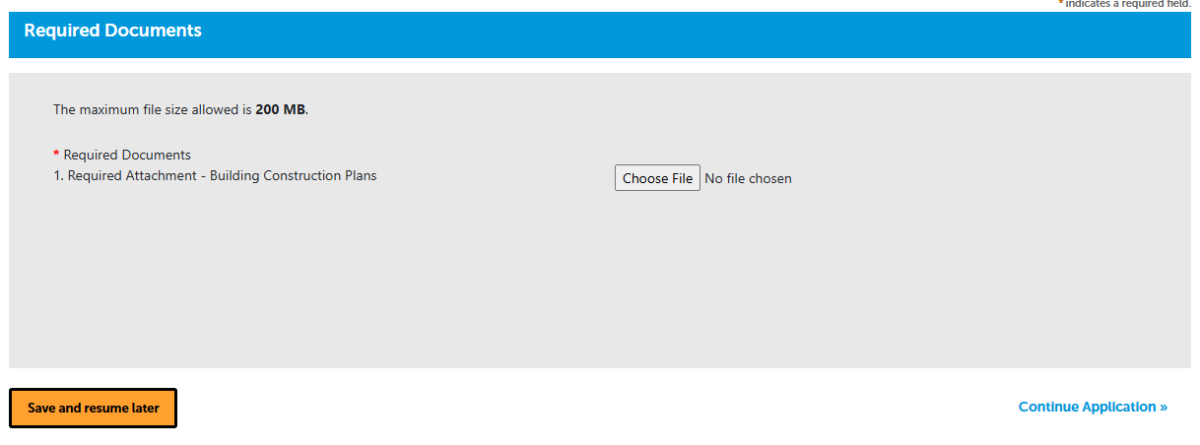
Once all the files have been successfully uploaded, press "Continue Application." 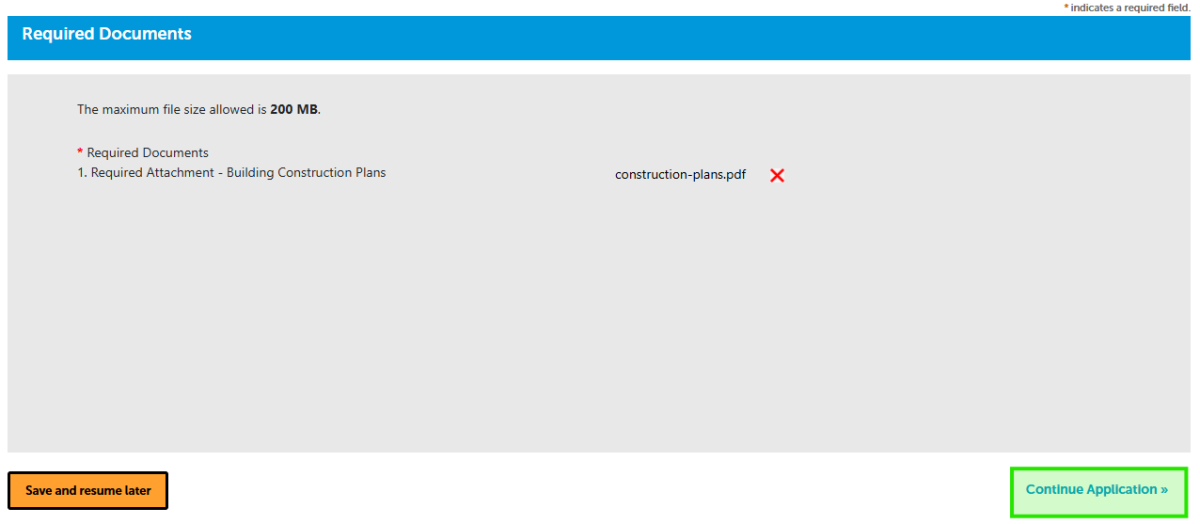
|
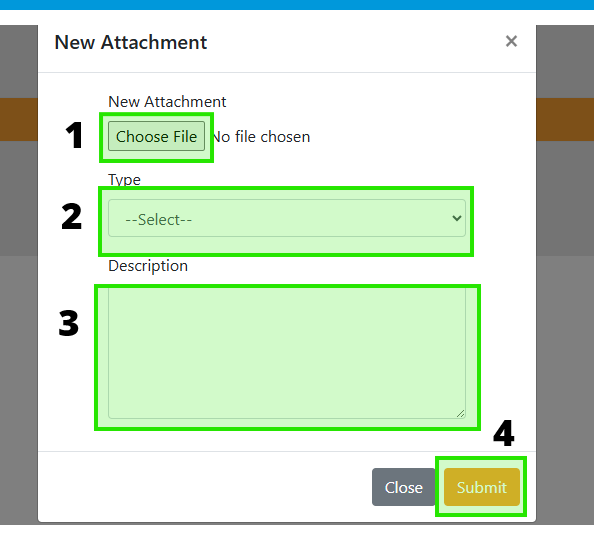
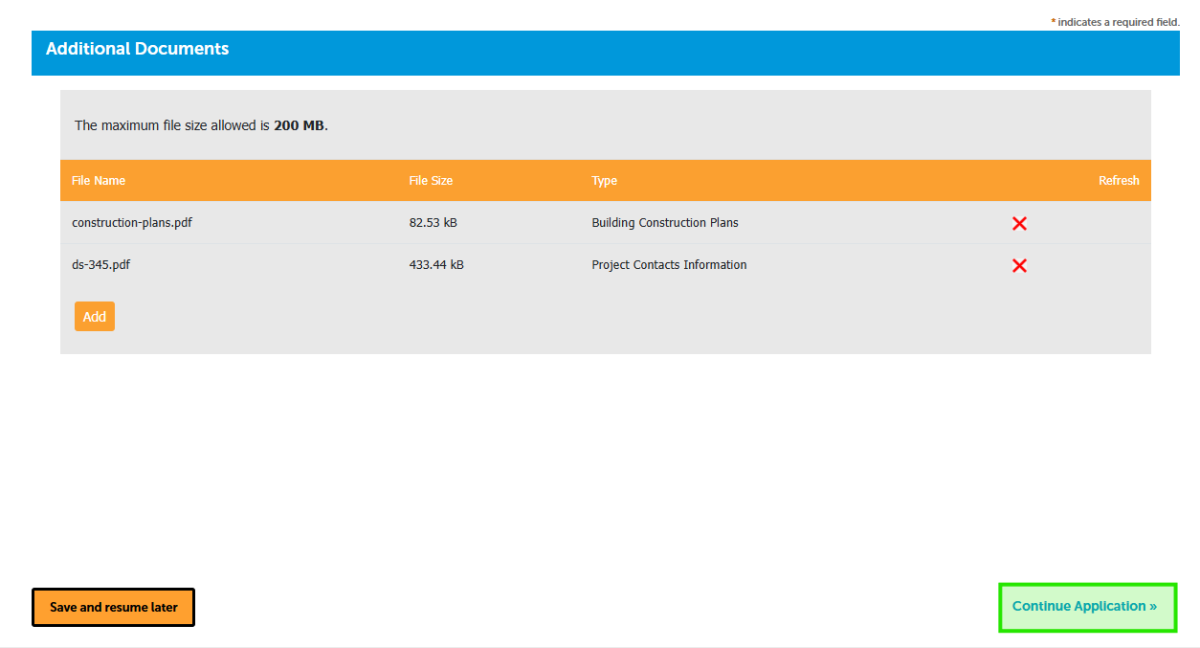
| 17 | Upload Additional Documents
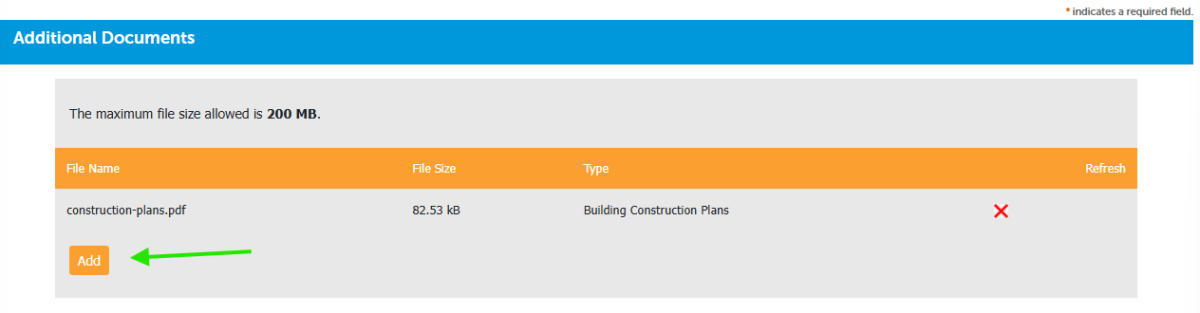
|
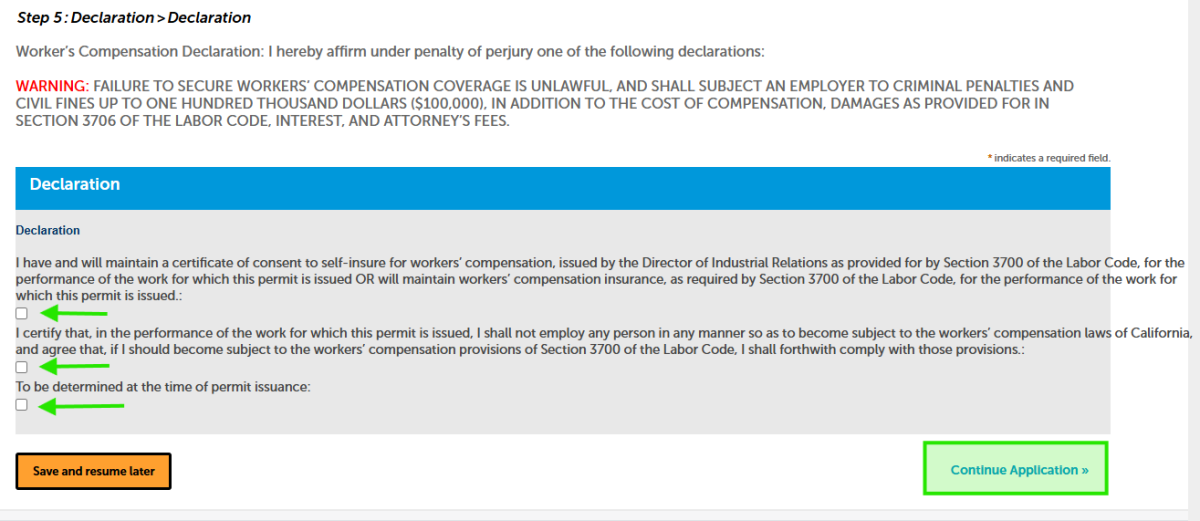
| 18 | Workers’ Compensation Declaration
|
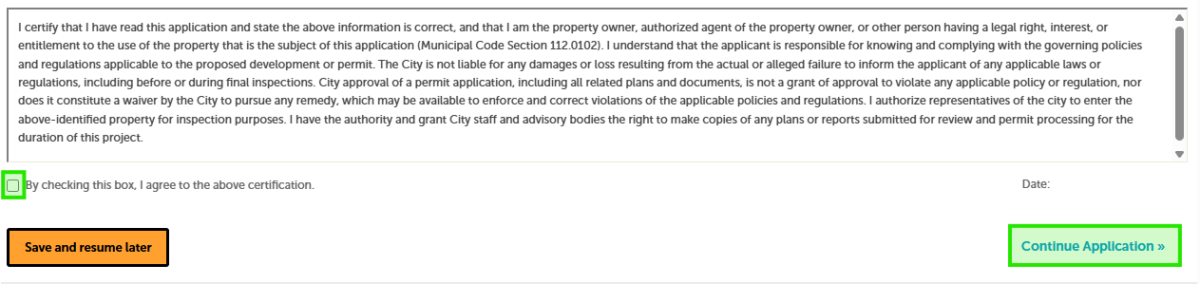
19 | Application ReviewReview the Application and return to previous steps by clicking on the numbered tabs at the top. 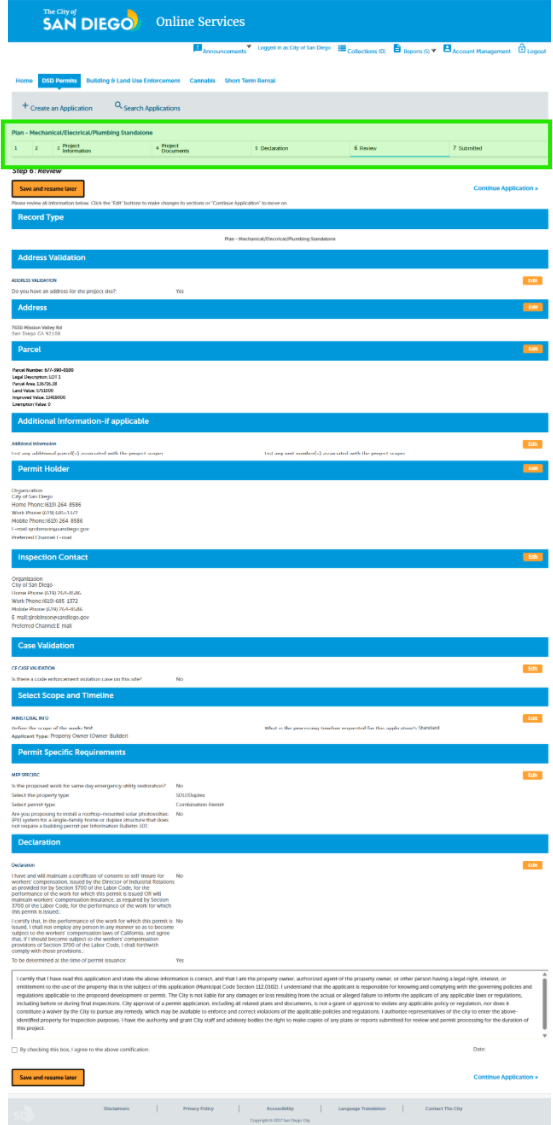
|
20 | Confirmation of Submittal & Creation of PRJ#Your record number will be created and displayed, and an email with further instructions will be sent. 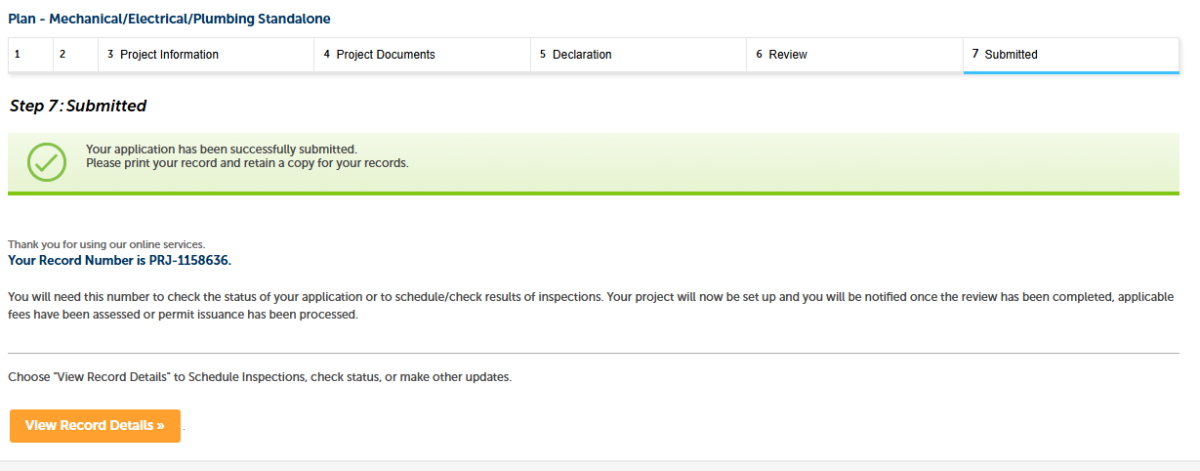
|
| 21 | You will receive a system-generated email with your project number and what to expect next. 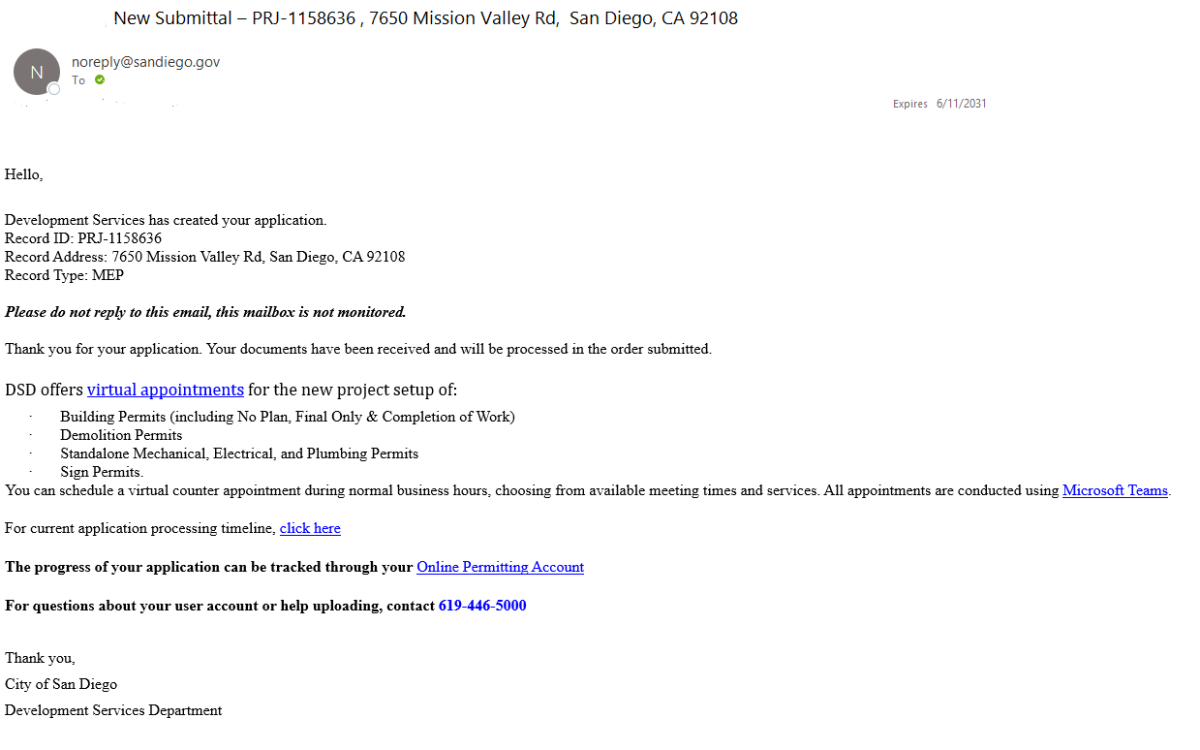
|